The main issue that needs to be addressed after purchasing a filter is its installation. It can be carried out both with the help of a qualified specialist and independently.
The greatest number of questions is caused by the installation of a reverse osmosis water filter and a triple water filter. In general, the operations are very similar.
Installation of filters for reverse osmosis water
Below we describe in detail all the stages of installation of a reverse osmosis filter.
1. Read the user manual
Before installing the water filter, you should carefully read the installation and operating instructions for the equipment to avoid installation errors.
2. Prepare the necessary tools
You will need:
- a wrench;
- a Phillips screwdriver;
- a drill;
- a ½” drill bit;
- several screws.
3. Clear the area under sink
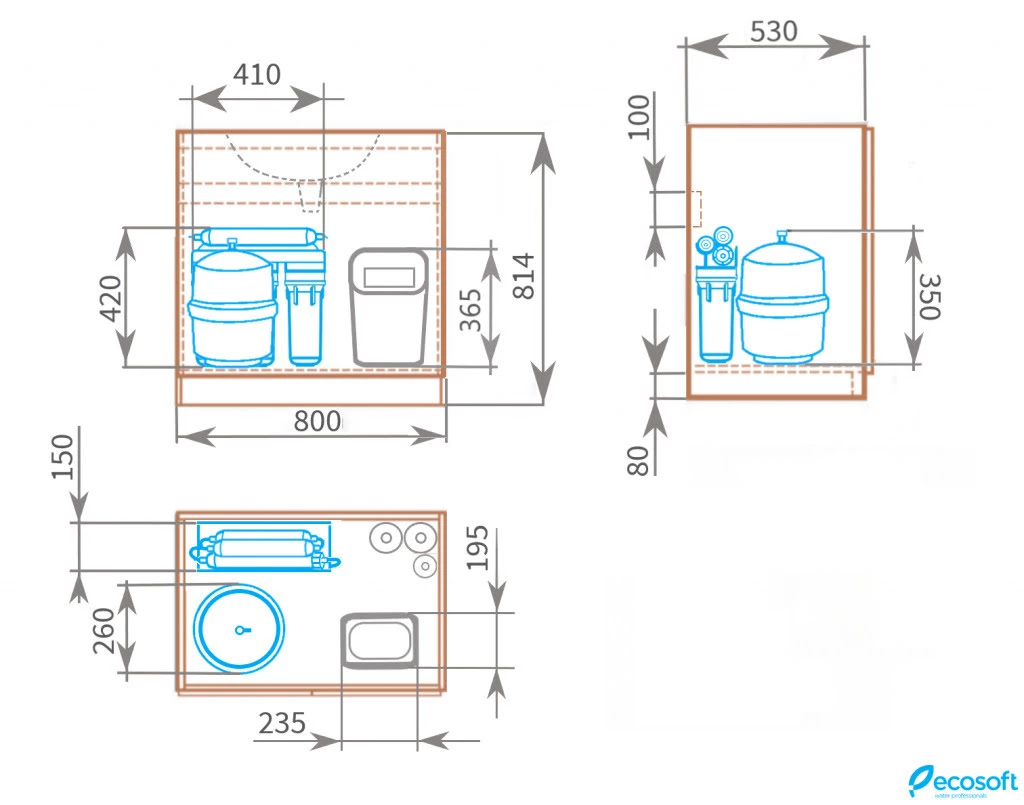
This is a necessary operation, both to make room for the filter itself and to ensure that you can get full free access to the installation site. Water filters can be installed both horizontally and vertically. It is worth trying on all the dimensions of the filter and deciding how to install it more conveniently. The figure below shows the most common location of the filter in the cabinet under the sink.
4. Checking the configuration
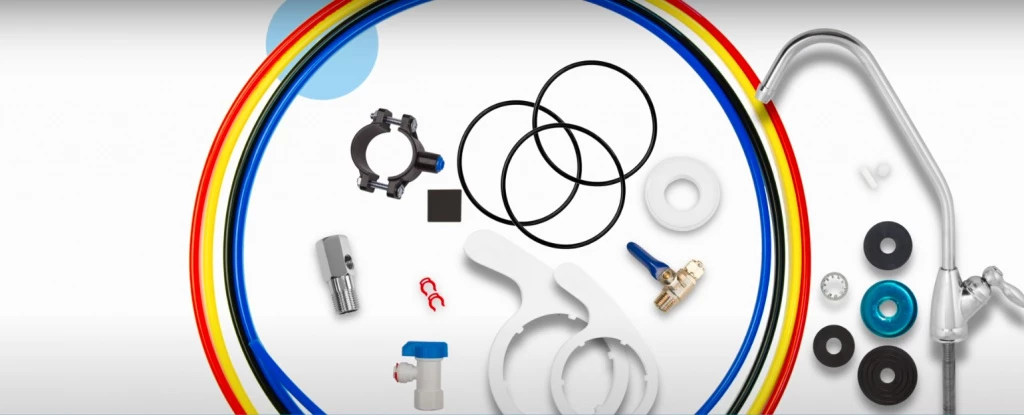
Take the system out of the package and check the presence of all filter components according to the instructions, as well as the necessary additional components and elements:
- filter housing;
- storage tank;
- cartridge set 1-2-3;
- membrane or set 4-5 (membrane and post-filter);
- mineralizer (if provided);
- purified water tap;
- colored tubes (red, yellow, black and blue);
- water supply tap;
- ½” tee;
- drainage clamp;
- tank tap;
- fumigation tape;
- service keys;
- O-rings;
- retaining clips.
5. Turn off the cold water tap and drain the remaining water from the system
In different houses and apartments, the cold water tap can be located in different ways. Possible locations: directly under the sink, at the water inlet to the house/apartment, in the bathroom.

6. Disconnect the water supply tube
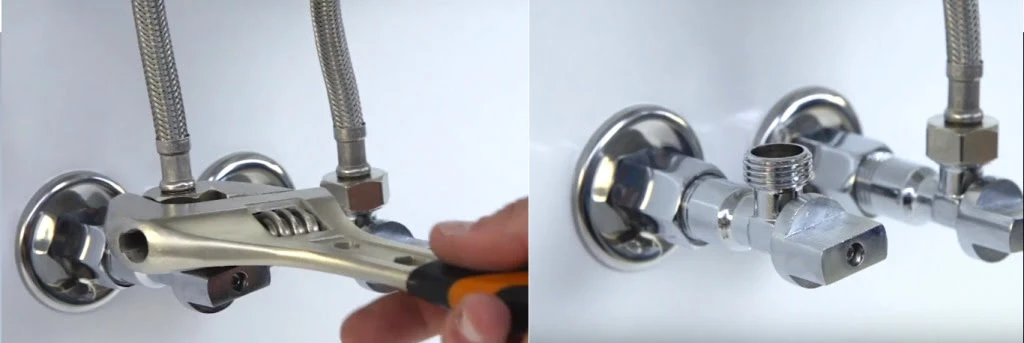
To do this, you will need a wrench or adjustable wrench.
7. Prepare the thread for connection

Use fumigation tape to seal the threads and prevent leaks during operation.
8. Connect the tee to the cold water mains and screw the water tap into the coupling

9. Unscrew the nut from the water tap and slide it over the red tube. Insert the tube into the water tap and tighten the nut

10. Installing the drainage clip
Drill a hole with a diameter of 5 mm.
You will need a drill and a diamond-coated drill bit for drilling metal or plastic surfaces.Apply the adhesive-backed sealant and install the drainage clamp by tightening the screws firmly.

To do this, you will need a phillips head screwdriver, the screws are included with the filter.
Insert the black tube into the drainage fitting and secure it with a clip.
11. Installation of the storage tank
- Wrap the fumigating tape over the tank thread;
- Screw the tank tap on and turn it to the “closed” position;
- Wrap the tank thread with fumigating tape in several turns. After that, manually attach the plastic faucet to the tank. Do not use excessive force, as this may adversely affect the operation of the system;
- Considering that the storage tank takes up quite a lot of space, it can be installed in a nearby cabinet, the maximum allowable distance is the length of the connecting tube.
12. Connecting the tap
Faucet Drill a hole with a diameter of 12.5 mm in the sink.
Attention: Metal chips after drilling can damage the sink, so they must be taken into account during manipulations!
Put the fasteners on the faucet in the following sequence: small rubber ring - chrome plate - large rubber ring. Install the faucet in the sink, put on the large plastic ring, lock washer and tighten the fastening nut.
Put the nut and compression sleeve on the blue tube, insert the cylindrical insert, and connect the tube to the faucet.

13. Final step - connect the filter
Connect the tubes to the filter (the color of the tube matches the color of the cap)

- Place the O-rings in the flasks.
- Place the polypropylene cartridge in flask 1 and the granular activated carbon cartridge in flask 2.
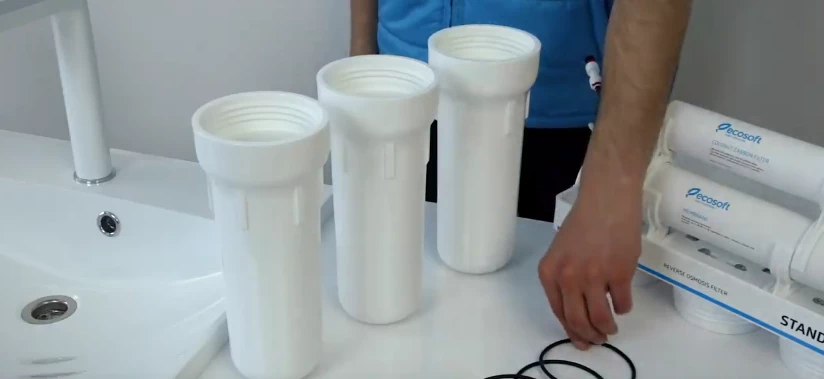
- Screw on all three flasks by hand.
- Disconnect the tube from the autoregulator.
- Open the cold water tap on the filter.
- Drain the first 5-7 liters of water to wash the carbon dust from the carbon cartridge.
- Connect the tube back to the autoregulator.
- Unscrew the flask and install the last (mechanical) cartridge from the cartridge set.Install the membrane in the housing.
- Drain the water for 30 minutes.
- Open the tap on the tank and close the purified water tap.
- Wait 1.5 - 2 hours for the tank to fill and drain all the water (8 liters).
- Repeat this operation twice to rinse the tank.
- After the third filling of the tank, your filter is ready for use.
If, after installing the filter, water does not come out of it and the tank does not fill up, one of the most likely reasons for this is the pressure in the reverse osmosis tank.
Connecting a triple filter
The principle of connecting a triple filter is similar to that of reverse osmosis. The task is simplified by the fact that there is no need to install drainage, storage tank, and the assembly of the filter itself looks much easier due to the smaller number of structural elements.
- Provide easy access under the sink for installation.
- Read the instructions in detail.
- Prepare the necessary tools.
- Check the filter package.The package should include the filter housing with replaceable cartridges, purified water tap, two colored tubes, retaining clips, water supply tap, ½'' tee, fum-tape, service key.
- Turn off the cold water supply and release the residual pressure by opening the tap.
- Disconnect the cold water supply pipe, connect the tee, and the cold water supply tap, pre-sealing the connection with fum-tape.
- Put the nut on one of the tubes (red) and connect it to the tee.
- Next, connect the cold water tap to the tee.
- Drill a hole and install the purified water tap.
- Put the nut, compression sleeve and cylindrical insert on the blue tube.
- Connect the blue tube to the tap. Screw on the nut, directing the tube inside the fitting as deep as possible.
- To install the filter under the sink, screw in the screws, use the bracket for convenience.
- Connect the red tube to the outlet port and secure it with a clip.
- Connect the blue tube to the outlet port and secure it with a clip.
- To check the filter operation:
- open the purified water tap;
- turn off the water supply tap;
- open the cold water valve;
- slowly open the water supply tap and set the flow rate to 1 l/min;
- check the system for leaks.

THE WATER FILTER INSTALLATION IS COMPLETE, NOW RUN THE WATER FOR 30 MINUTES AND ENJOY DELICIOUS AND SAFE WATER.
Faqs
What to сonsider before purchasing a drinking water filter?
You need to know:
- the condition of your water, if its quality does not meet the values acceptable for tap water, you may need to change the cartridges more often;
- the pressure in the pipeline: if you are going to install a flow-through filter for cold water, this issue is not fundamental, but the reverse osmosis system may simply not work if the pipeline pressure is less than 2 atm. For unstable pressure readings of 2-3 atmospheres, we recommend choosing a filter model with a pump so that there is enough water for the whole family. If there is a problem of frequent water hammer, we recommend installing an additional pressure regulator to avoid leaks.
What do you need to install a filter?
To connect the drinking filter you will need:
- a drill with a ½'' drill bit;
- a wrench;
- Phillips screwdriver;
- self-tapping screws.
Which water filter to install?
In this article, you will learn how to install a reverse osmosis filter and a flow-through filter for drinking water. If you are just at the stage of choosing a home filter, we recommend that you study the information here. We have tried to thoroughly but briefly review the principle of operation, as well as the advantages and disadvantages of household water treatment equipment.
